WooVina is the best FREE WooCommerce WordPress Theme
USE WOOVINA THEME TO BUILD YOUR NEXT SITE!
Strong Testimonials plugin has a lot of options, if you just want to display a few testimonials you could just type the testimonials in to a page or post. You don’t necessarily need a plugin to display your testimonials.
Go through this process to add as many testimonials as necessary.
Now that you have your testimonials, you need to make at least one View to display them.
Go to Dashboard > Testimonials > Views > Add New.
Name your view in a meaningful way. I am displaying this Testimonial “View” in the After Entry Widget Area, so I called this view “After Entry Widget Area View”.
These are the settings I used when making my “After Entry Widget Area View”…
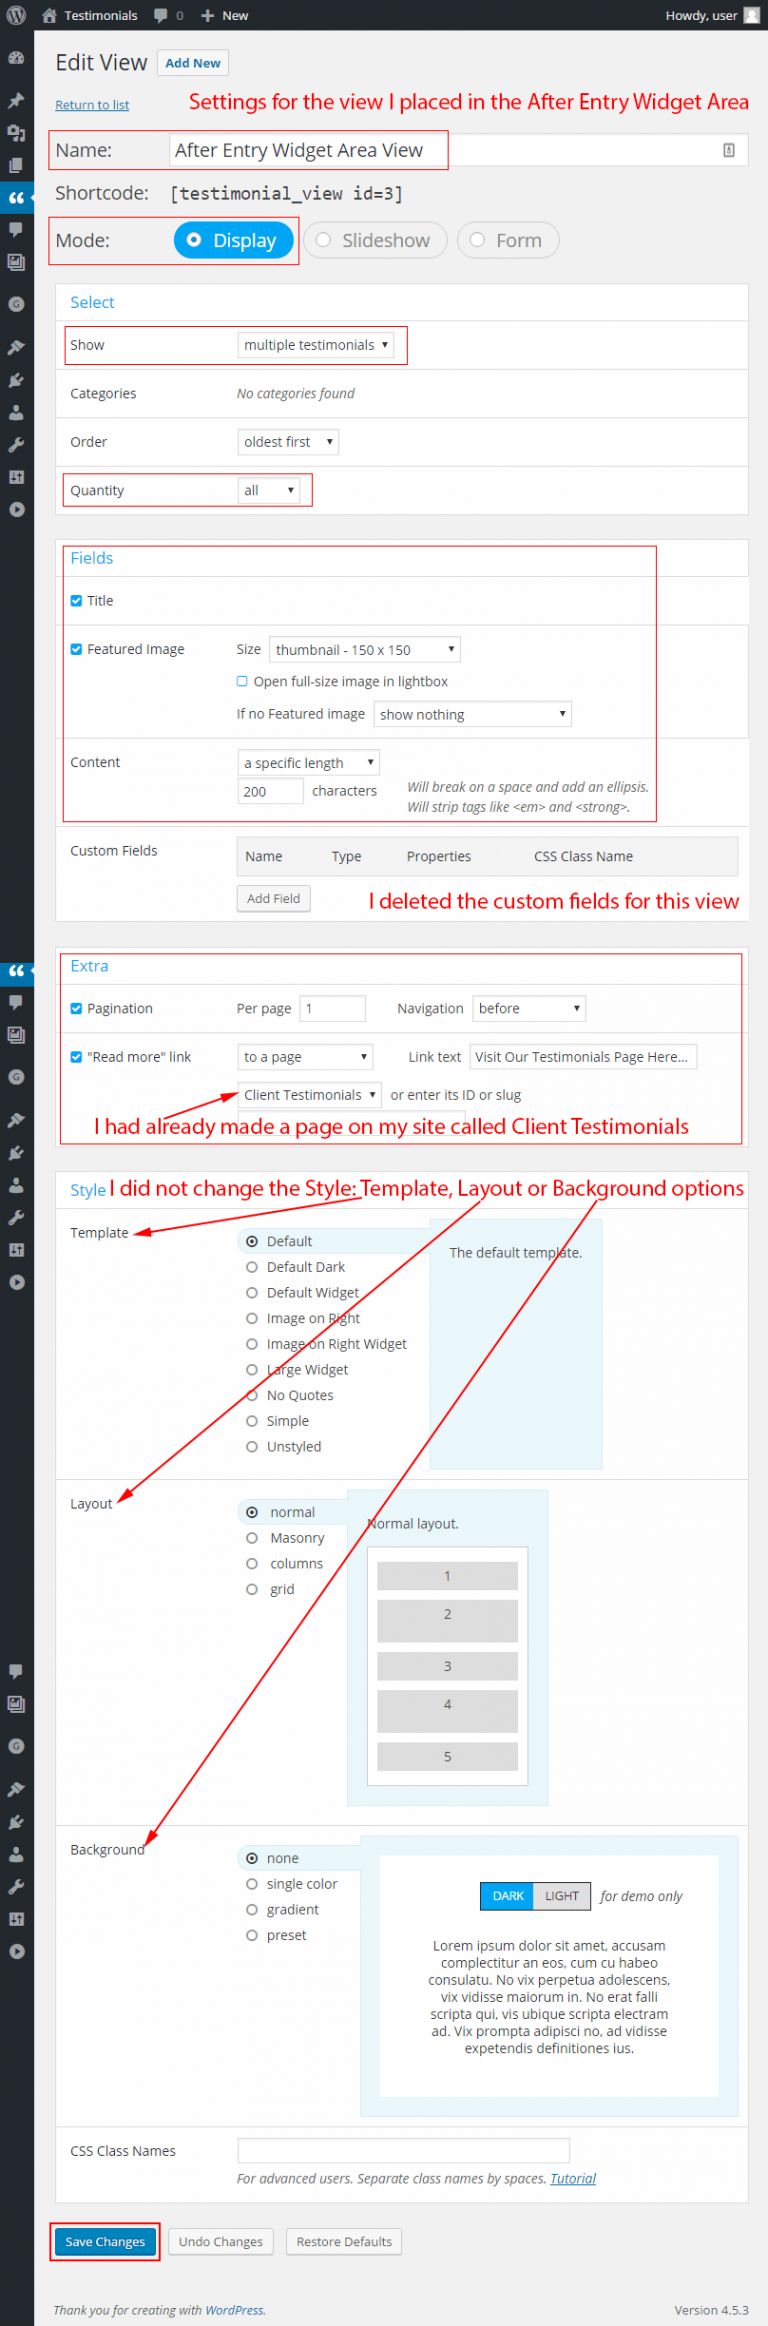
Mode: Display
The Select settings section…
Show: multiple testimonials
Quantity: all
The Fields settings section…
Title: yes
Featured Image: yes (if no featured image show Gravatar)
Content: the full testimonial
Custom fields: leave unchanged
The Extra settings section…
Pagination: yes
Per Page: 10
Navigation: before
Read More Link: to a page, Link Text: Visit Our Testimonials Page Here… From the Select drop down box I chose a page I had already made called Our Testimonials.
The Style settings section…
Template: Default
Layout: Normal Layout
Background: None
I remembered to Save my changes!
I’m going to display this Strong Testimonial View, in a widget area, using the “Strong Testimonials View” widget. So I don’t need to use the shortcode this time.
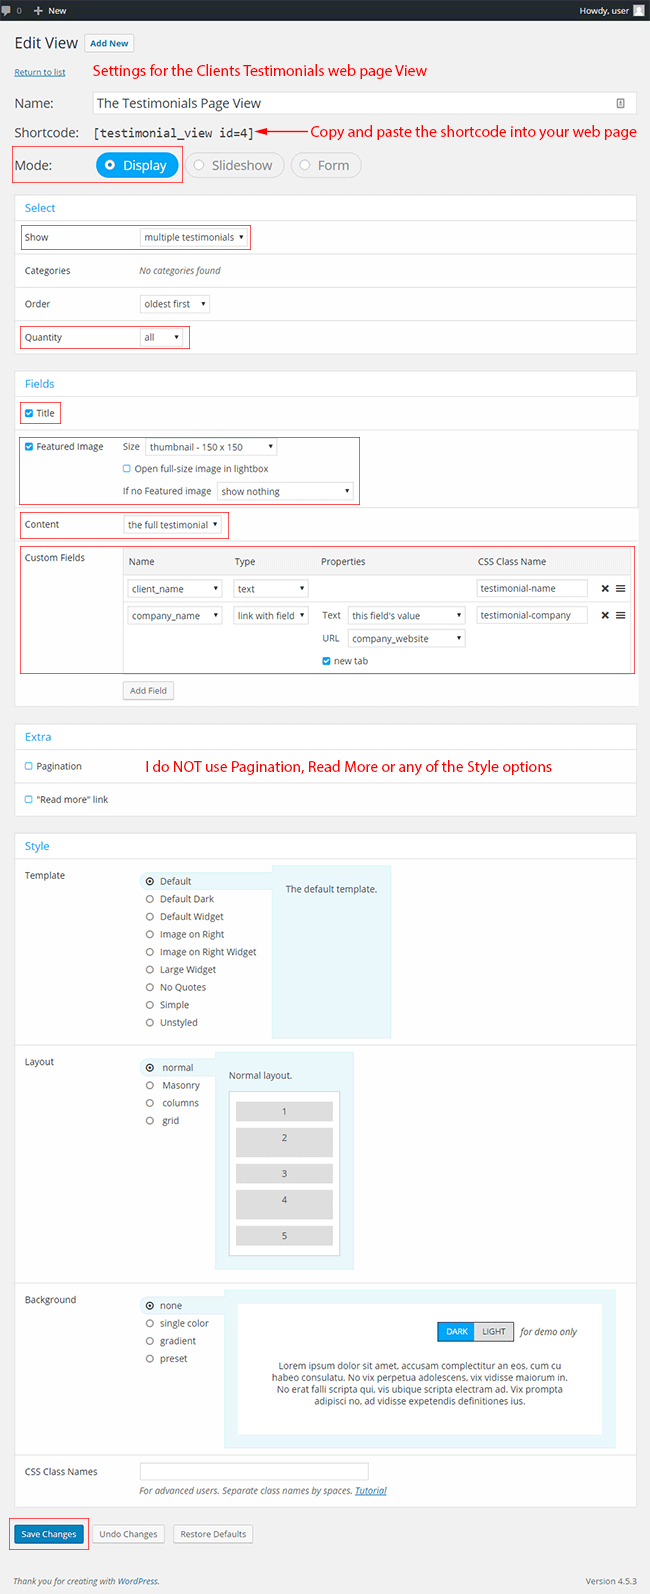
However if I wanted to add any view to a post or page, I would need to go to Testimonials > Views. Select one of the Views I’ve made. I then copy the shortcode from the top of that particular View’s page. I can then paste that view’s shortcode into a web page or post.
There are three important steps you need to take to display your testimonials using Strong Testimonials plugin...
You now have a set of testimonials and at least one View. Wherever you place a View on your site, the Strong Testimonials plugin will display the testimonials that you included in that particular View.
The View settings you chose, control the parts of the testimonials that are displayed and the style or look of your testimonial.
For instance, you can display the full testimonial, an excerpt of the testimonial or the first x number of characters from the testimonial.
Or, you could include a featured image such as a head and shoulders shot of the person who gave the testimonial, or the logo of their company etc.
So the three steps are…
The available View types are…
Strong Testimonials plugin has a feature that enables you to add a form for site visitors to upload testimonials to your site. I do not cover that feature in this tutorial. But a comprehensive tutorial is available on the Strong Testimonials plugin website.
P.S. If your pagination buttons are hidden below your header or navigation bar, you need to adjust the Dashboard > Testimonials > Settings > General tab > Scroll Top, setting… Un-tick the box or increase the “minus – pixels” number in the box.
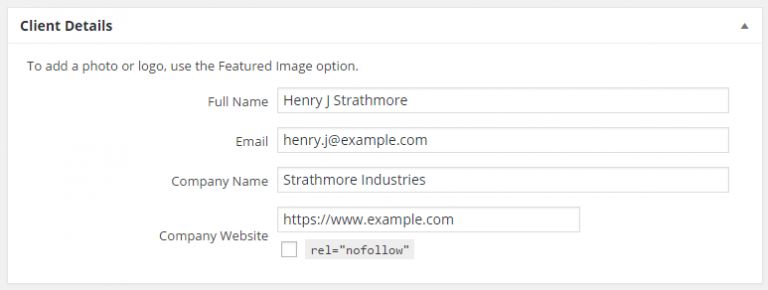
Make sure you enter all the required information, indicated by an asterisk (*). HTML code is not allowed.
WooVina is an intuitive & flexible, free WordPress theme offering deep integration with WooCommerce. 100% Love It Guarantee!