WooVina is the best FREE WooCommerce WordPress Theme
USE WOOVINA THEME TO BUILD YOUR NEXT SITE!
When you are trying to set up an online store using WooCommerce, shipping might be one of your concerns. In this article, we’ll cover everything you need to know about shipping for your store, including Shipping Zones, Rates & Shipping Classes.
On the backend of an ecommerce store, WooCommerce makes it easy for ecommerce sellers to calculate shipping rates based on zones and product weights. The platform offers a variety of tools to group products, automatically apply different shipping methods to different groups, and much more.
Regardless of whether you fulfill orders in-house or work with a third-party provider, following the steps in this guide will make sure that your WooCommerce shipping setup is simple, so you can start shipping orders ASAP.
To complete your WooCommerce shipping setup, you need to create shipping zones, followed by shipping methods and rates.
A WooCommerce shipping zone is a geographical area where certain shipping methods and rates apply. Within WooCommerce, these can be as general as entire countries or as precise as specific zip codes. Each customer’s address can be associated with only one WooCommerce shipping zone.
You can set up as many shipping zones as you like, as well as add different shipping methods and rates to each zone.
Your WooCommerce shipping zones and methods determine where and how you ship your products. To set up these WooCommerce shipping options, follow the steps below.
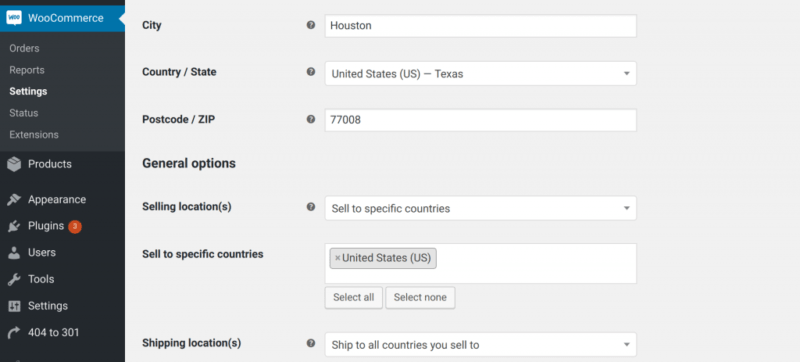
First, head to your WordPress dashboard, then navigate to WooCommerce > Settings. About halfway down the page, you should see a field marked “Shipping location(s).” This is where you can indicate which countries you ship to. Most sellers choose to ship to all countries that they sell to, which is the option shown below:
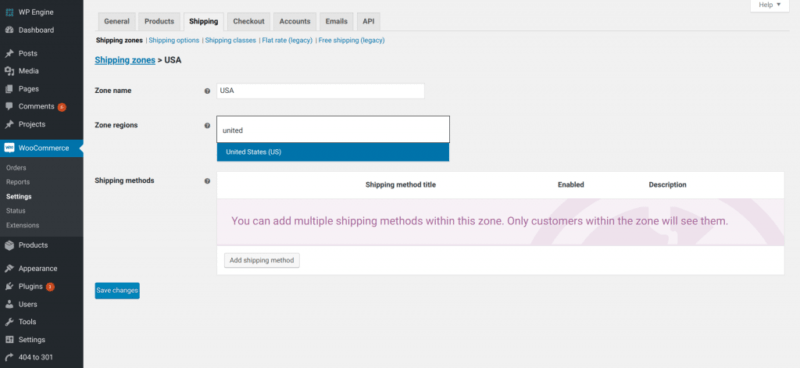
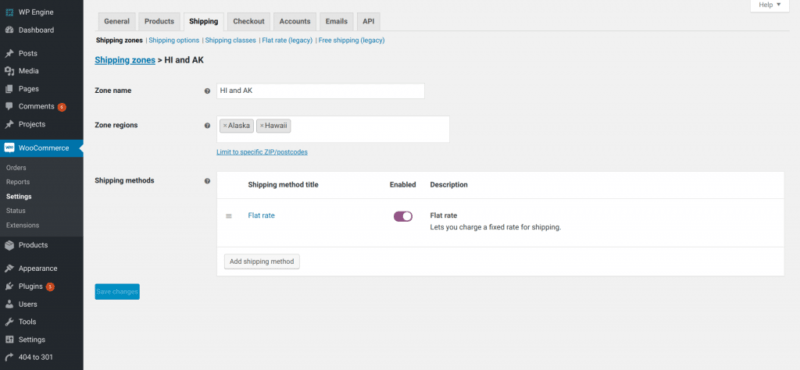
Once you’ve set your shipping location, go to the “Shipping” tab in your WooCommerce settings, then click “Add shipping zone.” This is where you’ll define shipping zones for your ecommerce store.
To add a new WooCommerce shipping zone, you’ll enter your Zone Name and define your Zone Region:
It’s worth noting that shipping carriers like USPS use the term shipping zones to measure the distance a package travels on a scale from 1 to 8 in the contiguous United States — in groupings of zip codes, not miles — from the point of origin to the destination. These probably won’t match your WooCommerce shipping zones, and that’s fine! Just keep an eye out for this terminology elsewhere as you learn more about shipping.
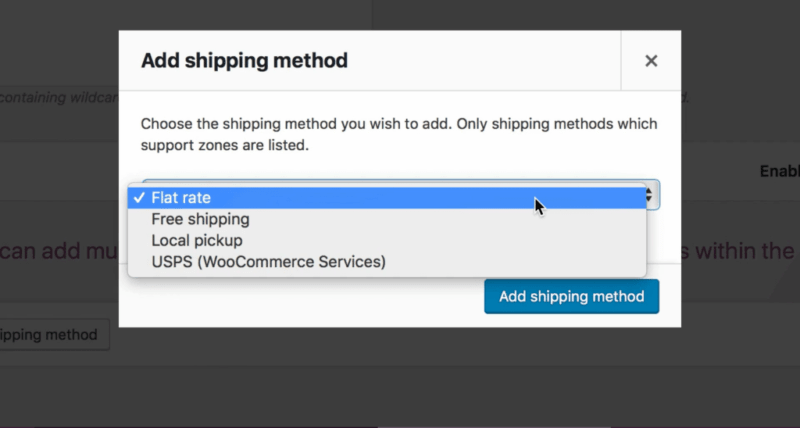
Finally, you will need to assign shipping methods to your shipping zone. Depending on how you choose to fulfill orders on your WooCommerce store, shipping methods can include flat-rate shipping, free shipping, local order pickup, and more.
At checkout, customers will only see the methods and rates available for their address and corresponding zone.
Once you’ve defined your shipping zones and methods, it’s time to decide how much customers will pay for each method.
If your method is free shipping, the customer shipping cost will, of course, be zero dollars. For local pickup, you can choose to set a fee or make it free. With WooCommerce Services shipping, you can add real-time USPS and Canada Post calculations on orders, then print labels within WooCommerce.
For WooCommerce flat-rate shipping, you’ll have to set up exactly how you want your shopping cart to calculate the rate. Here’s how.
Under the “Shipping” tab, choose the shipping zone that you want to set up flat-rate shipping for.
Once you choose your shipping zone and flat-rate shipping method, you’re ready to set up WooCommerce flat-rate shipping fees by clicking on “Flat rate” in the “Methods” box.
You can set up these fees several different ways, including:
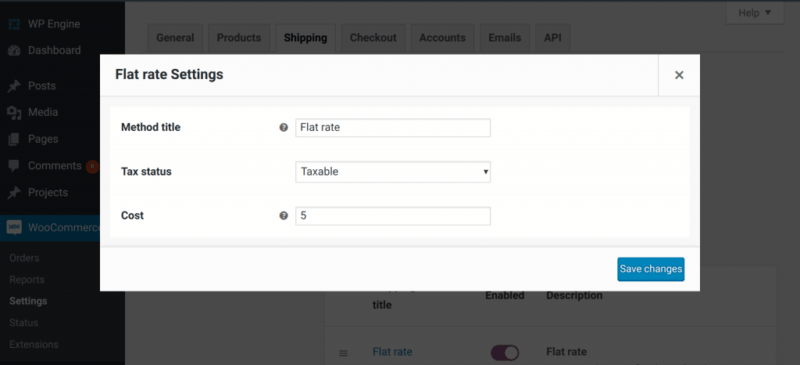
To set up your shipping fee on a per-order basis, you’ll choose a fee to apply to every order, such as $5 or $9.95. Then, enter that number in the “Cost” field:
To add a shipping fee on a per-item basis, you’ll choose a fee to apply to every item in an order, such as $2. Then, enter “[qty] * the fee” in the cost box — like this:
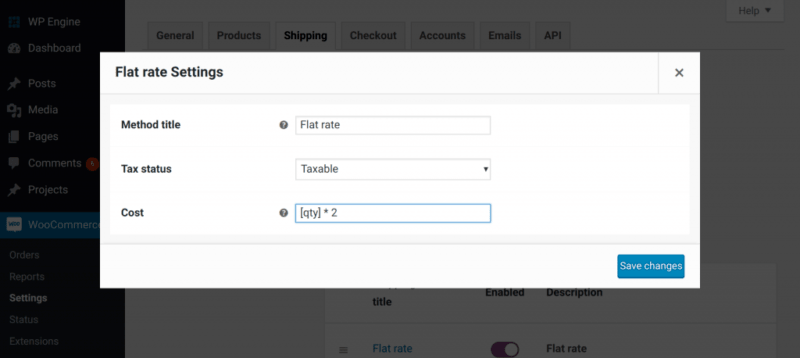
The above formula tells WooCommerce to multiply the number of items in a customer’s order by the fee you choose.
To add a shipping fee as a percentage of the order total, choose the percentage you’d like to charge, then enter “[cost * percentage as a decimal]” in the cost field:
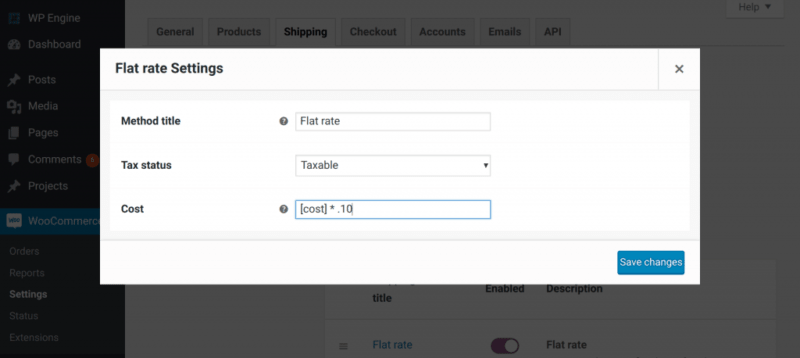
The above formula tells your WooCommerce shopping cart to multiply the total order cost by your chosen percentage in order to calculate your customer’s shipping fee.
Once you have your zones, methods, and rates set up, you can also set up shipping classes for specific products. Shipping classes are used to assign different shipping rates to different types of products. For example, you can assign different flat rate shipping costs to different product types grouped by sizes or weights.
Under the Shipping tab in your WooCommerce Settings, click “Add shipping class.”
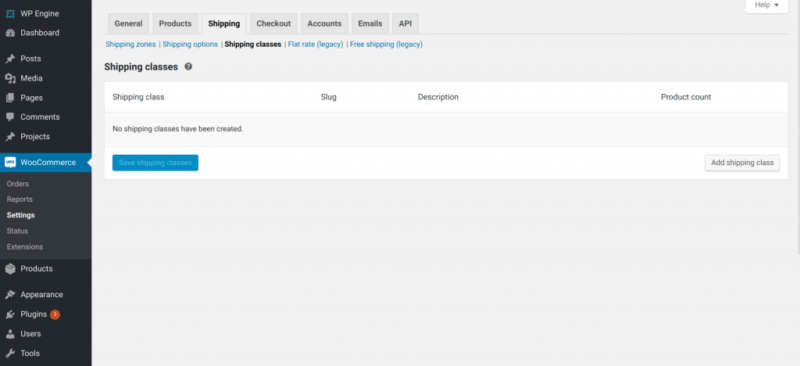
Enter a Shipping Class Name and the description of the class. You can leave the Slug field blank — WordPress will auto-generate one for you. Then, click “Save shipping classes.”
Next, you’ll need to assign each shipping class to a shipping zone and rate. This lets WooCommerce know what shipping option(s) and cost(s) to display when a customer purchases the product.
Under the Shipping tab, choose “Shipping zones,” then select the Zone where you want to edit the rate for this shipping class. Then, click on the rate you’d like to edit — for example, the flat-rate option. You’ll see an expanded “Flat-rate Settings” screen with a new section called “Shipping class costs:”
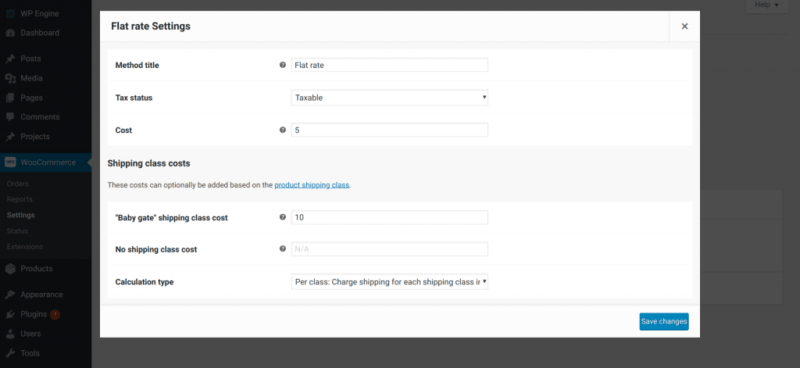
Here, enter how much you’d like to charge a customer in said shipping zone for flat-rate shipping on each shipping class.
For example, if you enter $10 next to the name of a shipping class, customers who choose flat-rate shipping for a product in that shipping class to be sent to the indicated shipping zone will pay $10.
Once your shipping classes are defined and priced, you can add them to products. For example, if you have a shipping class specifically for bulky items, you’ll want to assign that rate to each item you deem bulky.
To do this:
Hope you got a basic idea on how to set up shipping methods and rates on your WooCommerce store. For more information, checkout our WooCommerce shipping guide.
Make sure you enter all the required information, indicated by an asterisk (*). HTML code is not allowed.
WooVina is an intuitive & flexible, free WordPress theme offering deep integration with WooCommerce. 100% Love It Guarantee!